If you didn't come here from Scrap our Stash blog, you need to go there, because it's where the fun starts!!!.
Plus you'll find there all the instructions you need for this fun blog hop!
You should be coming from Christy's blog
For this blog hop, I prepared a tutorial to make this picture frame:

Let's Start...
Materials:
- Unfinished picture frame.
- Acrylic paints. I used cream and gold.
- Coffee filters.
- Needle and thread.
- Circle punch (optional)
- Liquid glue. I love Glossy Accents.
- Dew Drops
- Mists
- Bling

1. Paint the picture frame. I used 2 colors; cream as base and gold to give it a nice finish. Let it dry completely, mean while you can work on the flowers.

2. These are the coffee filters we'll use. In the second picture; you can see the kind of cuts we need to make. It is optional if you want to make those wavy cuts, they can be straight.

3. These are the cuts we'll use to make the flowers.

4. The strips will look like this when you open them.

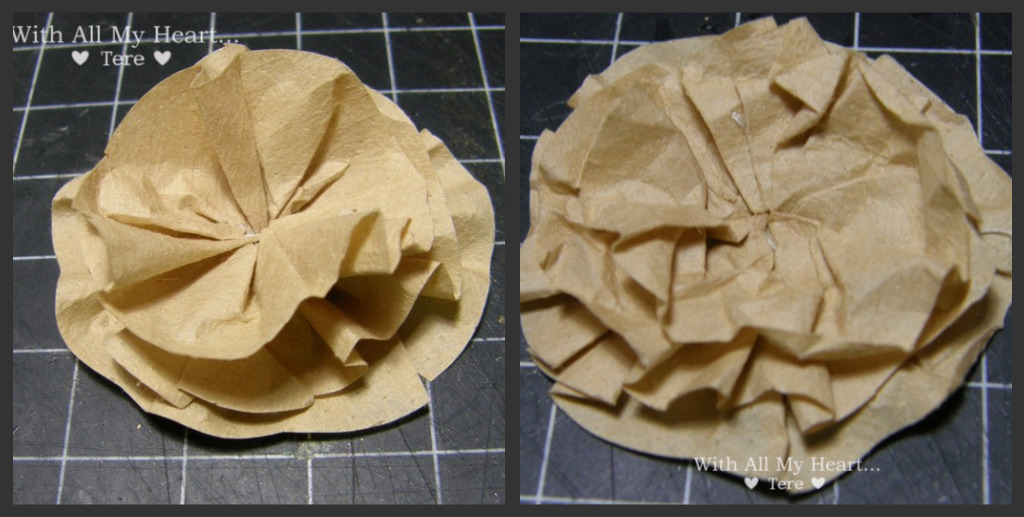
5. Make a running stitch on the bottom of each strip and pull it tight to gather together. It's like making a yo-yo flower but with paper.
The second picture shows you how it looks like at the end.
It's not looking pretty ...yet... just wait.

6. You need to make 3 yo-yos for each flower.
Cut a circle, 1" approx. and glue down the first yo-yo.
Still no pretty enough uh?
7. Glue down the other 2 yo-yos. After they are completely dried, crunch them a little bit, or a lot, depending on how you like them.
They are looking better...

8. Using your favorite mists ( I used my own, you can find a post about them HERE! ), mist the flowers, I used a pretty red color, you know? a Christmas color.

9. To make them more Christmas looking, I added some Dew Drops, again, I used some I made. You'll find the tutorial HERE!
Now they do look pretty.. what did I tell you?

10. From the coffee filters left overs, I hand cut some leaves and misted them green.
Get the dried frame, some bling from your stash and with your flowers and leaves, you are ready to decorate the frame.

11. Add a cute picture, like this one of my friend's daughter, and you'll have a beautiful decoration for this coming Christmas!!!
As a thank you for participating and visiting my blog... I'll be giving away a $ 20.00 Gift Certificate from Two Peas to a lucky person.
a). Just leave me comment
b). Become a follower of my blog
... that's all you need to do!!!!
NOW... to continue the fun you need:
1. My secret word, which is: ITS
2. Hop to the next stop which is the blog of: Ren Yi!
The BLOG HOP ENDS on SUNDAY 7/25 at 6PM. I will choose a random winner on Monday 7/26
Thank You so much for participating... and happy hopping!!!!

25 comments:
The frame turned out awesome--and thanks for the flower tutorial! I became a follower and a fan on fb!
www.pinkcricut.com
I like the tutorial the flower, divine. thanks friesds
Que linda forma de hacer las flores gracias por compartirlo
Love the frame and the flower. Thanks for the detailed instructions. I am now a follower of your blog and liked your facebook page.
Great picture frame Tere! What a great Christmas present idea!
Very cute end product! Love the flowers and thanks for the tutorial. :)
Beautiful frame! Thanks for the easy to follow directions on making this awesome project.
Oh I love this idea! I am going to have to do this! Thank you for the inspiration!
What a great tutorial! Thank you!
I love this idea and will be using it for gifts in the future! I am following your blog now!
What a great way to make flowers and that frame is gorgeous!
Tere esta divino este porta retrato..pero quedo ummmm en ingles? por fa ayuda. Un abrazo Te repito esta divinoooo
Muy hermoso. ¡Adoro las flores!
Thanks for the tutorial!
Love the colors you use for frame! I would never thought to use coffee filter to make flower. I will have to try that. Became ur follower! thanks.
Wow Tere! I love this!! The frame turned out gorgeous! I want to make some flowers like this!!! Thanks for the great tutorial, I will be back! :)
Monica
OMG!!!! Love the Flower!!!! So Great and really adds to the frame! Thanks for the great idea! I'm a follower now!
I LIKE!! y no entendi mucho lo q escirbiste , mas me dijieron las fotos jajaja, ahora me voy al traductor!
besos!
Wow - will be making those flowers this afternoon - thanks so much!
I'm a new follower now!
Hi Tere...that frame is GOR-GEOUS!!! Great tutorial on the flowers...gonna have to try that!!
I love it Tere and it is so beautiful! I would love to try but would you guide me step by step over the phone?? (lol)!! No seriously it may happen!
Tere amiga.... Beautiful... Love the tutorial.. See u around let me keep hopping !!!
Ivette
Tere - those flowers are just wonderful. thanks so much for showing a tutorial. i always wanted to know what to do with the way too many coffee filters i have!
What a cute frame! Love it!
What a neat project! It would make such a greta gift!
Wow amiga parece q llegue un poquito tarde para esto (jeje)
Q belleza de trabajo, el tuto esta muy bueno, y las fotos estan de alta calidad. Buen trabajo amiga - como siempre !
Post a Comment